


5 Common SEG Graphic Issues in Booth Construction
 Sep 17, 2026|
 View:5
Disclosure: This guide is published by Lintel Display, a manufacturer of SEG frames, light boxes, and portable display systems. It draws on our installation and field-support experience across multi-show deployments. Product links and recommendations reference our own systems. Where general industry practice applies, we say so, but readers seeking fully independent guidance should weigh this against other qualified sources.
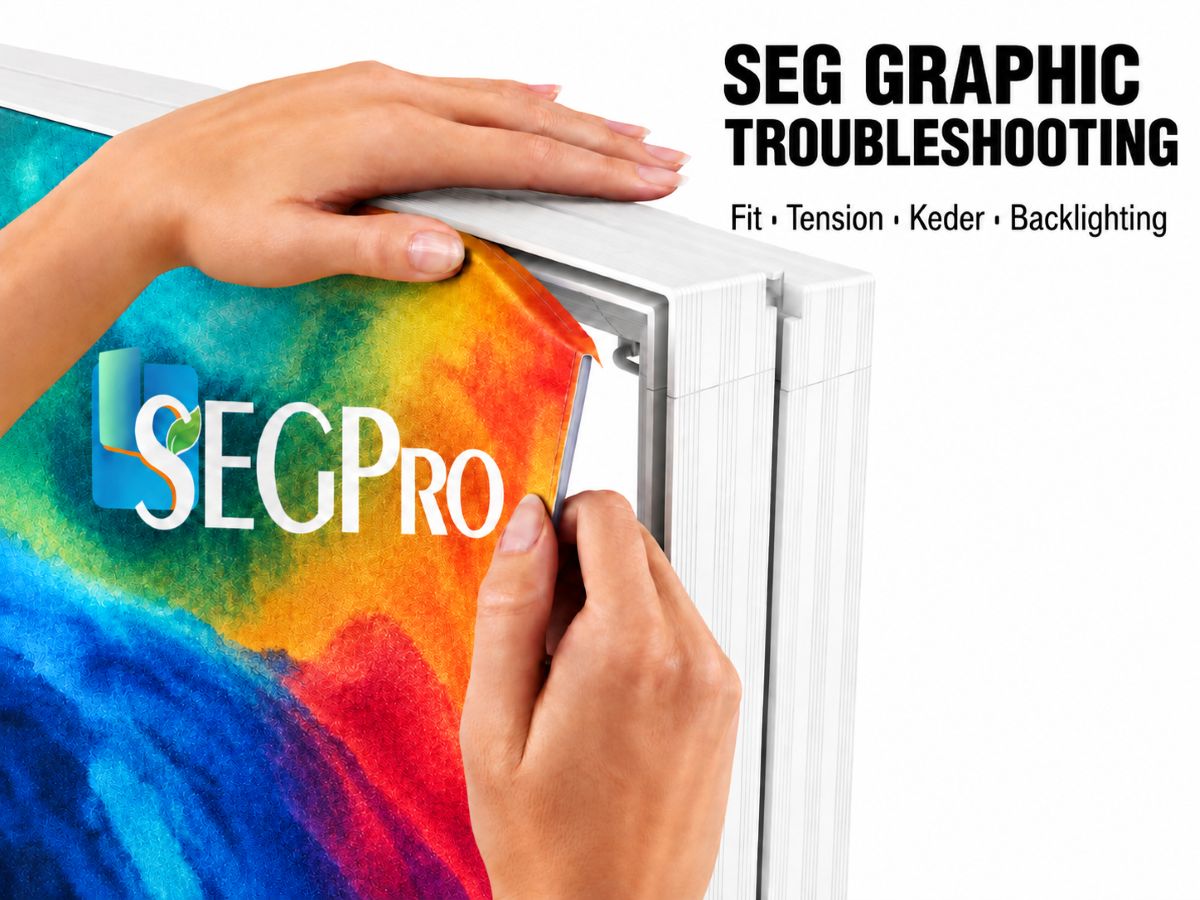
Most SEG graphic failures never show up at the print shop or the warehouse. They appear on the show floor, ninety minutes before a client's booth opens. A panel that sags, a silicone edge bead that pops loose, or a backlit graphic speckled with hotspots damages client relationships and eats into the hard margin of an exhibition contract. In our own field-support work, the majority of urgent show-floor calls we receive trace back to one of five recurring causes — all of them preventable well before the venue doors open.
The mechanics behind these failures are well understood, and in nearly every case they trace back to decisions made long before installation day.
Our installation crews and field-support engineers have worked thousands of SEG builds, from single-panel retail signs to full modular booth walls, and the patterns below repeat with striking consistency. What follows is drawn from that hands-on experience — the same failure modes our technicians troubleshoot on show floors, not a theoretical checklist.
Three stages account for most problems: print specification errors made before production, handling damage that accumulates between shows, and installation technique that distributes tension unevenly across the frame. Knowing where each failure originates is what lets a procurement or project manager build the right qualification criteria into supplier relationships and show-prep workflows.
The five issues below account for the majority of on-site SEG graphic problems reported across multi-show deployments. Each one follows the same structure: root cause, prevention protocol, and the failure mode that results from ignoring it.
Issue 1: Print Specifications That Do Not Match the Frame
When a graphic arrives at a show and either refuses to seat properly or immediately sags after installation, the cause usually traces back to a file specification that was wrong before a single print was made.
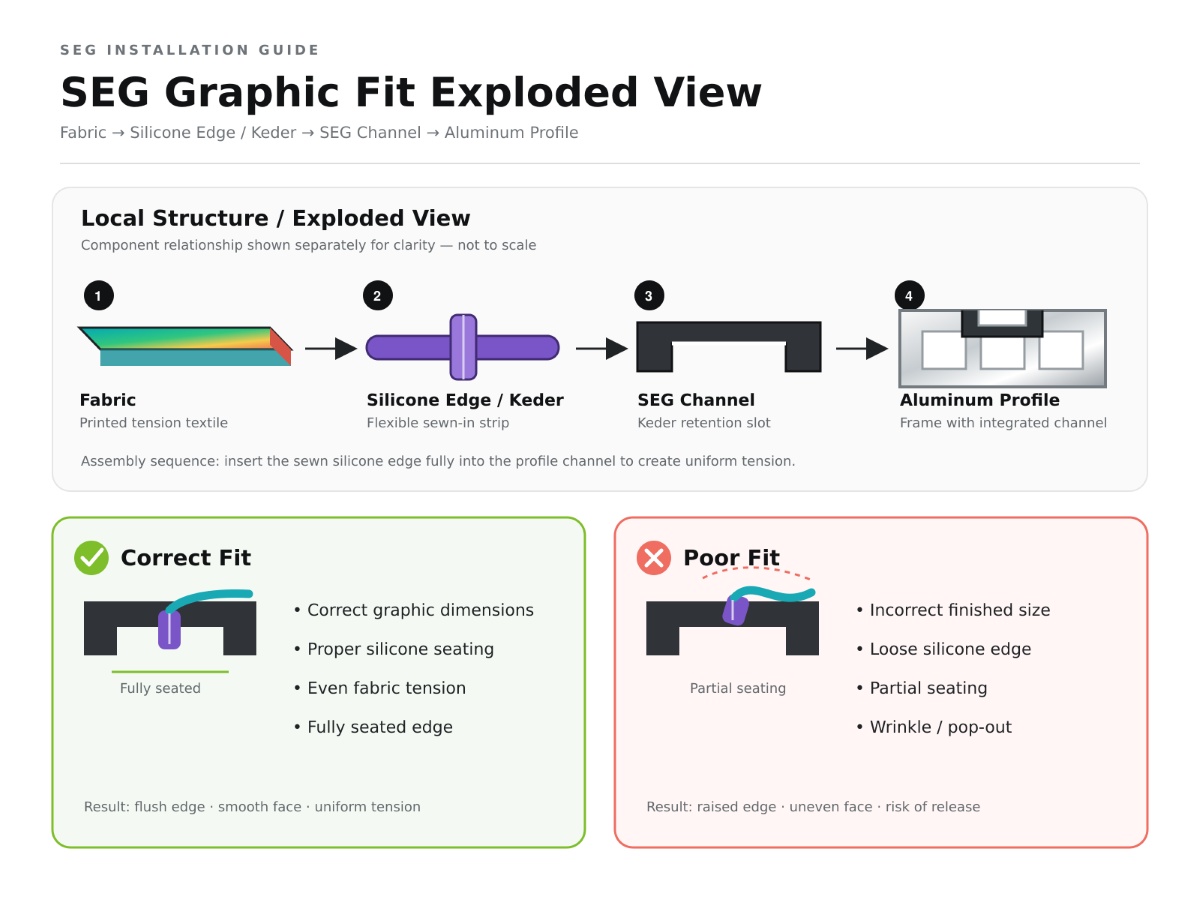
SEG graphics are not sized to the visible frame opening. They are sized to the frame opening plus a consistent bleed on all four sides, and that bleed is dictated by the keder, or silicone bead, specification of the frame system in use. A 10mm keder requires roughly 10mm of fabric bleed per side. A 12mm keder, the most widely used standard at 12mm wide and 3mm deep, requires a different allowance. Frames built for 14mm keder need yet another. Apply a generic 1-inch bleed to a system engineered for a tighter keder and the panel ends up slightly oversized, unable to reach proper tension. Apply too little bleed and there is not enough fabric to seat the bead fully, so the graphic pulls out of the channel under installation tension or simply through normal display use.
Fabric stretch consistency compounds the risk. SEG fabrics commonly carry an elastic stretch of 2% to 10%, and that stretch differs by direction on the roll. A fabric with 6% shrink along the running length and 2% across the width produces a different cut dimension than a uniformly stretching material. Using the frame manufacturer's exact template is the only reliable way to account for these variables.
Prevention protocol
Request the system-specific graphic template from the frame hardware supplier before production begins. A template from a previous project is not transferable to a different frame brand.
Confirm the keder width of the exact frame system in use, whether 10mm, 12mm, or 14mm, and verify that the print shop's file setup reflects it.
For any new fabric material or print supplier, run a physical sample insert test in an actual frame section before committing to a full print run.
The XQUIC™ SEG Frame is built with a consistent channel depth and a documented keder specification, which lets procurement teams establish one verified file template for every order placed on that system instead of re-specifying for each show.
Pro Tip: When qualifying a new print supplier, ask for their SEG file setup guide and compare the bleed values against your frame manufacturer's channel dimensions. A mismatch caught at this stage costs nothing to fix. The same mismatch discovered on-site costs rescheduling fees, rush reprints, and client trust.
Issue 2: Silicone Edge Bead Pop-Out
A silicone edge bead that was never fully seated fails visibly and fast. One section of the graphic pulls forward from the frame, tension redistributes into the surrounding fabric, and the repair window during a live show is measured in minutes.
The most common cause is installing the silicone without the fabric. When the bead is pressed into the channel before the fabric has been folded over the edge, the groove fills but the fabric overhangs loose. Under installation tension, the bead rides back out. The correct technique is to fold the fabric edge over the bead so the silicone strip sits toward the inside face of the panel, then seat both together as a single unit. When installation is complete, the stitching that joins silicone to fabric should be completely hidden inside the channel.
Sequence matters just as much. Starting from the middle of any edge creates diagonal tension that pulls the bead away from the corners. Corners go in first, then the center of each side, then the remaining fabric fills in evenly from those midpoints outward. This keeps tension symmetrical and prevents the corner puckering that shows up most often on large-format panels.
Frame channel condition is a separate variable. A channel that has been bent, scratched, or deformed in transit will not grip the bead consistently along its full length. Inspecting the aluminum extrusion before every install, not just the first one, catches the shipping damage that accumulates over a season of events.
Prevention protocol
Verify that your installation crew folds the fabric over the bead rather than inserting the bead alone.
Standardize the sequence: four corners seated first, then midpoints, then fill out. Never start mid-side.
Add a channel inspection to the show-floor checklist and look specifically for dings or bowing in the extrusion at connection points.
Issue 3: Fabric Wrinkling and Sagging After Storage or Transit
A graphic that arrives with heavy fold creases or visible sag is not always a print quality problem. More often it is a storage and handling problem that compounds across event cycles.
Trade show SEG fabrics are typically knitted polyester, which holds up through a limited number of high-tension installation cycles before losing the elasticity that keeps tension even across the panel. Fabric stored folded, especially under compression in a shipping case, arrives with memory creases that tension alone may not relax. Fabric that has been through many shows without replacement can sag even when installed correctly, because the material no longer has the stretch recovery required.
Storage method is the first variable to control. Rolling SEG panels instead of folding them prevents the compression creases that form along fold lines. When a shipping case forces folding, placing the graphic face-in with a light interior wrap reduces crease depth. A handheld fabric steamer held roughly 6 inches from the back surface relaxes transit creases in most polyester materials without damaging the print. That is a standard show-prep step for experienced crews, not a repair measure for a problem that should never have occurred.
Sagging that returns after steaming and correct installation signals that the fabric has reached end of life. Re-installing and re-steaming degraded fabric does not address the cause and produces diminishing results at each event.
Prevention protocol
Store SEG fabric panels rolled with a light protective wrap rather than folded flat.
Build a steaming step into the standard pre-show prep workflow instead of treating it as a reactive fix.
Track installation cycles per panel and set a replacement threshold, either a fixed number of shows or visible signs of stretch fatigue, as part of your asset management protocol.
️ Warning: Steaming directly on the graphic face, or at a distance closer than about 6 inches, risks heat damage to the print surface and the silicone bead. Always steam from the back of the panel.
Issue 4: Uneven Tension and Image Distortion
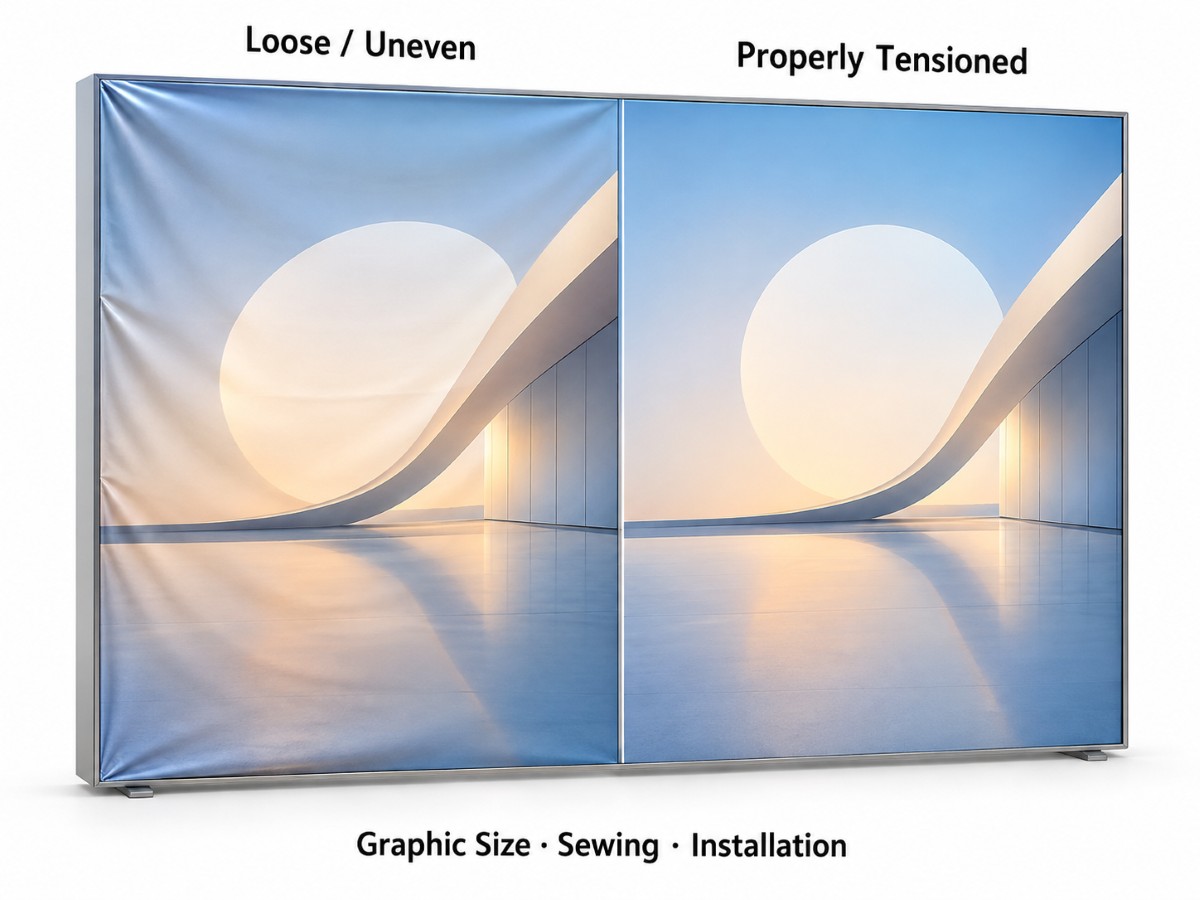
When a brand logo appears skewed, a grid pattern looks stretched on one side, or a geometric graphic shows diagonal distortion, the problem is nearly always installation sequence rather than print or frame quality.
Diagonal tension develops when one side of the graphic is pulled deep into the channel before the opposite side has been started. That creates a bias across the fabric in the direction of the first-installed edge, and the bias locks in as the remaining sides get seated. The further installation proceeds with the bias in place, the harder it becomes to correct without pulling the graphic entirely and starting over.
Starting from the corners prevents diagonal bias by anchoring four reference points before any edge tension accumulates. Once the corners are seated, the center of each side is the next insertion point, which brings each edge toward its midpoint symmetrically. From those four midpoints, the remaining fabric works outward in small increments on both sides of each midpoint at the same time. The goal at every step is roughly equal tension on opposing edges.
Gentle, consistent pressure matters as much as order. Forcing a large section into the channel in one push creates localized high tension that distorts the image in that zone and over-stretches the bead. Working the bead in 2 to 4 inch increments lets the fabric redistribute tension across the panel as installation proceeds.
Prevention protocol
Write the corner-first sequence down as a formal procedure for all show-floor crews rather than leaving it as informal knowledge among experienced installers.
Brief temporary or contracted installation labor on the correct sequence before they begin.
After installation, step back at least 10 feet and check for visible diagonal lines, edge bunching, or image skew before clearing the booth area.
For large-format or curved configurations, SEG accessory components such as dedicated insertion tools give better control over bead seating than finger pressure alone and reduce the installer fatigue that leads to rushed technique late in a complex booth build.
Issue 5: LED Hotspots and Color Inconsistency in Backlit Displays
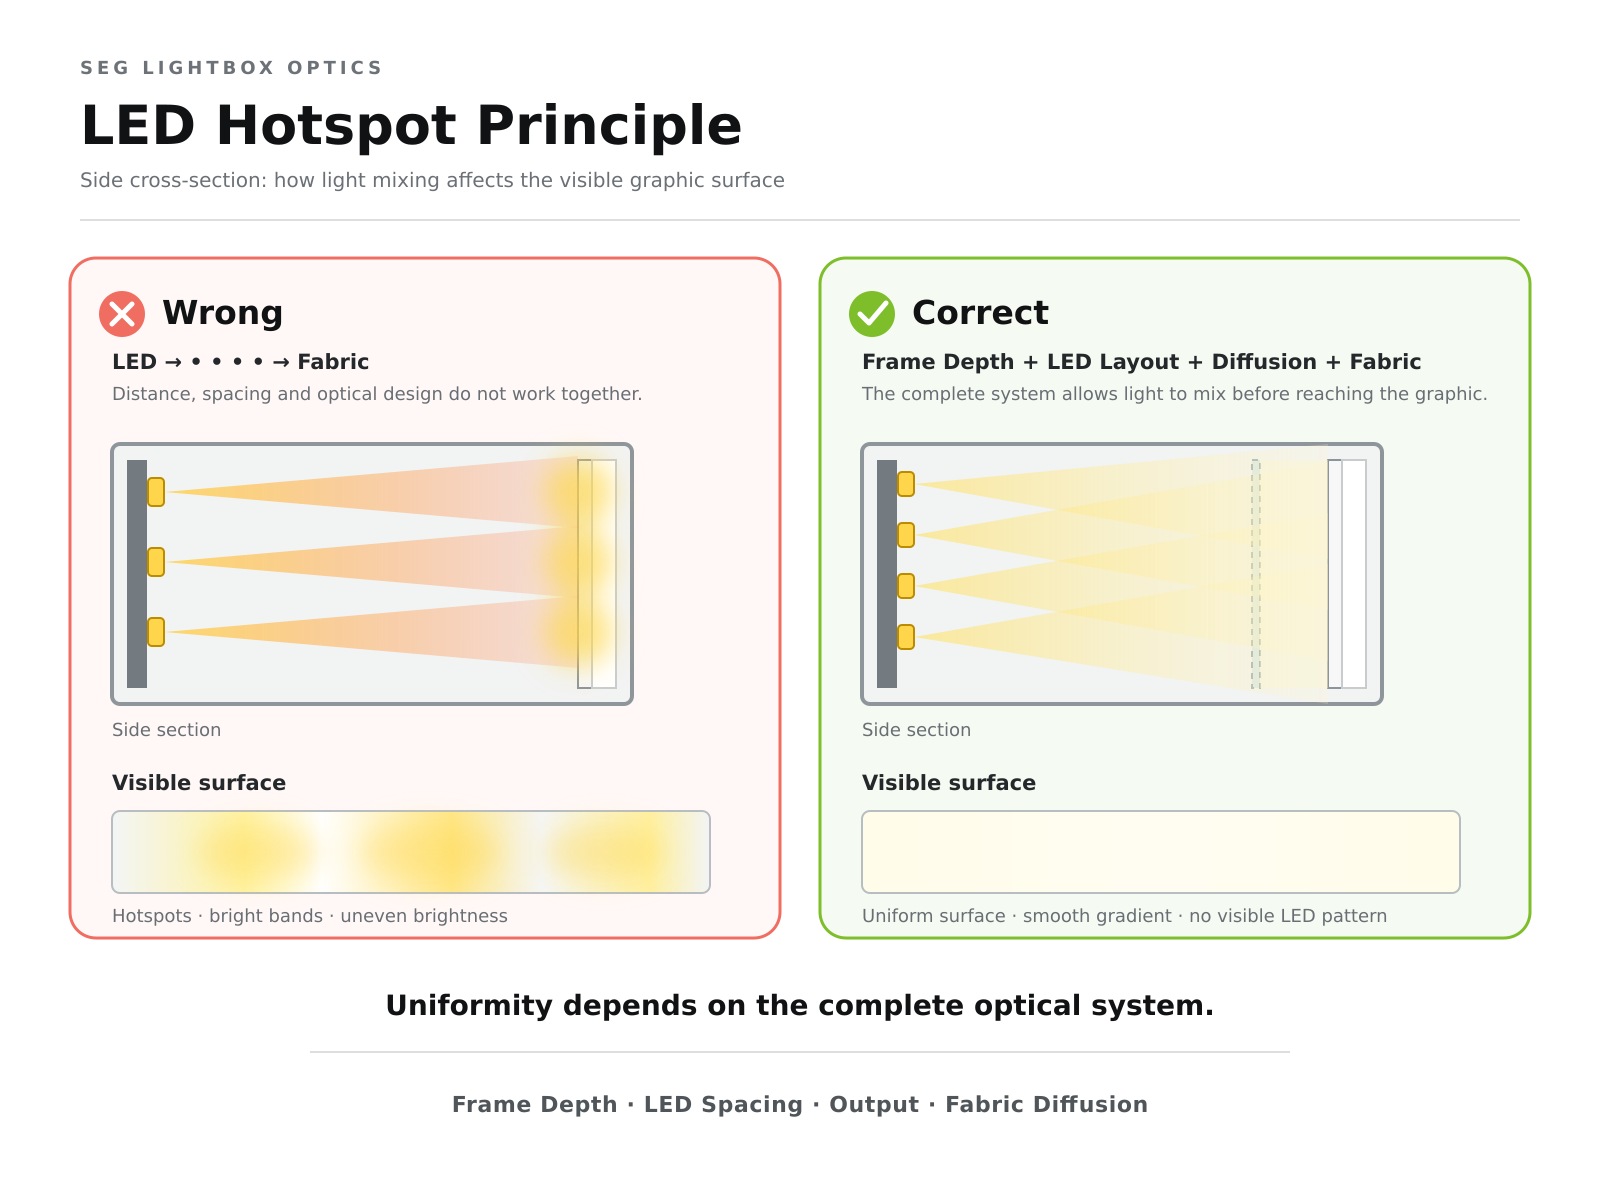
Backlit SEG graphics add a second layer of failure risk on top of the frame and fabric variables that affect non-illuminated displays. A panel that looks flawless when unlit can reveal hotspots, dark zones, or washed-out color the moment the LED system is energized. If the assembled display has never been tested under show conditions, the first time this problem surfaces is when the client sees it.
The most common source of hotspots is insufficient diffusion distance between the LED strips and the fabric face. As a practical rule, the throw distance from LED to diffuser should be at least equal to the spacing between adjacent LED strips. A frame with shallow cavity depth that brings LEDs close to the fabric without a diffusion layer produces visible bright bands directly in front of each strip. Adding a diffusion layer or increasing frame depth solves this. Substituting a brighter LED strip makes it worse.
Fabric selection for backlit use is a separate decision from fabric selection for non-illuminated frames. Knitted polyester intended for front-lit applications may pass light unevenly when backlit, and those inconsistencies read as hotspots. Fabric specified for backlit use, designed for even light diffusion across its surface, is the correct material for any illuminated SEG system.
Color accuracy depends on two variables that both need managing: the artwork color profile and the method used to evaluate the proof. Artwork prepared in RGB and printed without conversion renders differently under backlighting than a file set up in CMYK with a print-specific profile. Requesting a physical proof printed on the final fabric and reviewing it inside the actual lightbox, rather than under ambient light, is the only reliable way to verify color before a graphic ships.
Prevention protocol
Specify backlit-rated fabric for every illuminated SEG application. Do not substitute standard frontlit material.
Confirm that frame cavity depth provides at least the LED-spacing distance of clearance in front of the strips.
Require CMYK artwork with a color-managed workflow from print suppliers on all backlit orders.
Test the assembled lightbox under power before shipping, with the graphic installed, viewed from a minimum of 10 feet.
The SEGPRO® Modular Light Box is engineered with a calibrated LED layout and enough frame depth to spread illumination evenly across the fabric face, which reduces the hotspot risk that shallow-cavity alternatives routinely produce. Lintel Display verifies LED uniformity as part of outgoing inspection. The 99.47%+ figure cited here refers to our internal outgoing quality-inspection pass rate on manufactured units; it is a manufacturer-reported metric rather than a third-party audited result, and you should ask any supplier for the underlying inspection methodology before treating a pass-rate claim as a comparability standard.
Prevention at a Glance
All five issues share a common shape. Each one originates at a specific, identifiable decision point in the project workflow, and each is preventable with the right specification, supplier qualification, or procedural control.
Issue | Root Cause | Key Prevention Step |
|---|---|---|
Print specifications | File setup mismatched to frame keder width | Use the system-specific template; confirm keder dimension |
Silicone bead pop-out | Wrong installation technique; channel damage | Fold fabric over bead; insert corners first; inspect channels |
Fabric wrinkling or sagging | Fold storage; stretch fatigue after repeated use | Roll storage; steaming protocol; track cycles and replace on threshold |
Uneven tension or distortion | Asymmetric installation sequence | Formalize corner-first sequence; brief every crew |
LED hotspots or color shift | Wrong fabric; insufficient diffusion; RGB artwork | Specify backlit fabric; verify cavity depth; CMYK workflow; test under power |
Building these checkpoints into supplier qualification requirements shifts quality control upstream, where corrections are cheap, rather than onto the show floor, where they are not.
Working With a Supplier Who Controls the Variables You Cannot See
Most SEG graphic problems are not caused by careless crews or inattentive clients. They come from tolerance mismatches that originate in the manufacturing and specification chain before hardware ever reaches a show floor.
Procurement teams that source frames and graphics separately, without confirming the two are matched to the same channel and keder specifications, introduce compatibility risk that no installation technique can fully offset. Working with a hardware supplier who documents system specifications precisely, holds consistent manufacturing tolerances, and publishes verified graphic templates for each frame product removes the largest category of failure before it reaches your booth.
Lintel Display's SEG Quick Frame Booth and SEGPRO® light box systems are developed as matched ecosystems, where frames, channels, and graphic specifications have been engineered and tested together rather than assembled from separate sources. With over 30 years of manufacturing experience serving customers in 138+ countries, plus OEM and ODM services for custom applications, the team can help procurement managers specify the right system for multi-show deployments where consistency matters more than first-order price.